

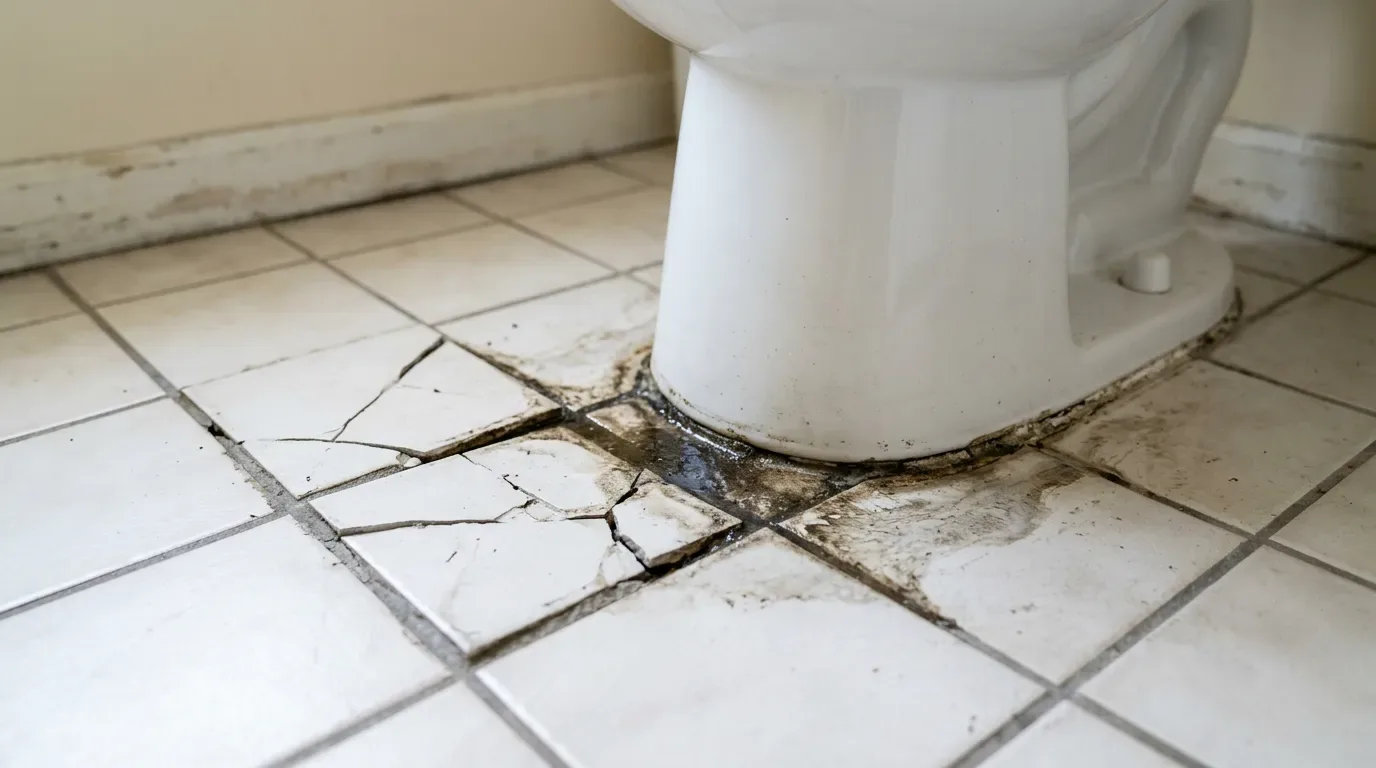
A puddle of water around the toilet is an unpleasant surprise that can spoil anyone's mood. It is a fairly common problem for condo owners and homeowners alike. A toilet leaks from the bottom for different reasons, and it is important to find the source in time to avoid more serious consequences. Water on the floor is not only a nuisance – it can ruin the flooring, cause an unpleasant smell and even create problems for the neighbors below.
Worse is the case where there is no puddle at all. A bathroom can look perfect. Smooth tile, clean grout lines, a dry floor. But behind that picture there can be moisture that does not drip anywhere, yet is already destroying everything from the inside. It hides in the joints, under the caulk, under the toilet. It makes no noise and leaves no puddles. And that kind of hidden moisture is the most dangerous one. You cannot see it until it is too late. Often the first thing a homeowner notices is a soft floor around the toilet or tiles that sound hollow underfoot.
Below we go through what a soft spot in the bathroom floor means, where the water usually comes from, how to check the toilet and the tile yourself, and in what order the repair goes.
What a Soft Spot in the Bathroom Floor Means
At first the damage is invisible. The air gets a little heavier, as if more humid. Then a faint, musty smell starts to show up, especially after a hot shower. Next come darkening caulk, spots in the corners, swollen cabinets. This means the moisture has already gone into the material. It does not stay put – it builds up and destroys. Drywall starts to rot, particleboard swells, tile comes away from its base, and the air carries mold spores that you breathe every time you walk into the bathroom.
Under a toilet the same process goes into the floor itself. When water keeps getting under the tile or vinyl at the base of the toilet, the wood subfloor beneath soaks it up and does not dry out. Over time it softens and rots. That is why the floor gives a little when you step next to the toilet, or the toilet itself starts to rock.
The problem with hidden moisture is that you cannot see it – and so it gets ignored. People look at the tile and think: "it's clean, so everything's fine." But the rot and mold start inside. By the time they become visible, the structure inside is already affected. Re-caulking the base or replacing a cabinet is not enough, because under these elements everything is already working against you. Many of the same early clues show up on walls too – see these hidden signs of water damage behind walls.
Where the Water Comes From: Signs of a Leaking Toilet
Understanding why the toilet is leaking will help you find the right fix faster. Most often water comes out from under a toilet for a few main reasons.
Toilet Wax Ring Leak
The first and most common cause is a damaged wax ring between the toilet and the floor. This sealing ring makes a watertight connection between the toilet and the drain pipe. Over time the wax ring can crack, deform or simply wear out, and a leak appears. Because the water leaks at floor level on every flush, a toilet wax ring leak is one of the usual reasons for rot right around the toilet base.
Loose Mounting Bolts
The second cause is loose toilet bolts. When the bolts that hold the toilet in place work loose, the tight fit is lost, and the toilet leaks from the bottom. This can happen because of the house settling or simply over time with constant use. A rotting subfloor makes it worse: the bolts have nothing solid to hold on to.
A Crack in the Toilet Base
The third cause can be a crack in the base of the toilet itself. This happens less often, but the ceramic base can crack from a mechanical impact or temperature swings, and that also leads to leaking.
Wax Ring vs. Supply Line vs. Shower Pan
Not every wet floor near the toilet is the toilet's fault. Water can travel under tile from neighboring sources and come out somewhere else. Roughly, it breaks down like this:
- Wax ring: the wet area and the soft spot are centered on the toilet base, and the floor gets worse right around it.
- Supply line: water drips from the connection behind the toilet, so the wet spot starts at the back and runs forward along the floor.
- Shower pan or tub: the soft or hollow area sits next to the shower or tub and spreads toward the toilet, not out from it.
How to Check the Toilet Yourself
Before you start any repair, it is important to pin down exactly why the toilet is leaking and where the source is. A correct diagnosis saves time and money on unnecessary work.
- Look around the base. Wipe the floor around the toilet dry and lay toilet paper or a rag around the base. Wait a few hours and check whether moisture has appeared. This will help you find the approximate spot where the toilet is leaking.
- Check the mounting bolts. Carefully rock the toilet from side to side. If you feel play or movement, the bolts have loosened, and the toilet is leaking because the connection is no longer tight.
- Look for cracks. Use a flashlight and carefully inspect the entire surface of the toilet, especially where it meets the floor. Even small cracks can let water through.
The Dye Test and the Water Meter Check
Two more simple checks come from the EPA WaterSense leak-check guide:
- Dye test: put a few drops of food coloring into the toilet tank. If the color shows up in the bowl within 10 minutes, the flapper is leaking.
- Meter check: read the water meter before and after a 2-hour period when no water is used in the house. Any change suggests a leak somewhere in the plumbing.
A leaking flapper wastes water inside the bowl but does not wet the floor by itself. If the dye test is clean but the meter still moves, the leak is somewhere else – in a supply line or a pipe under the floor.
Hollow or Loose Tiles: What Happens if Water Gets Under Tile
A dull sound when you tap the tile almost always means there is an air gap between the tile and the base. But the sound by itself does not say how dangerous it is or whether the floor needs to be redone. The job of tapping is not just to hear a "thud", but to locate the area, judge its size and match it to the layout of the tile.
Why Tile Sounds Different
Tile that is bonded over its whole area works as one with the base: a tap on it is damped by the adhesive layer and the floor, so the sound is short and ringing. If a cavity has formed under the tile – from too little adhesive, delamination, or voids in the mortar bed – the tile starts to vibrate freely and the tap comes back as a low, dull tone. The bigger the unbonded area, the lower and more "barrel-like" the sound.
Hence the main rule: what matters is the difference in sound between neighboring areas of the same surface. There is no known "correct" sound in advance – it depends on the tile thickness, the base and the adhesive. So the comparison is always relative: first find an area that rings with confidence, then judge the rest against it.
How to Tap the Floor
Any hard object with a small contact area will do: the handle of a screwdriver, a coin or a metal key, your knuckles. Tap moderately: the goal is to get a response, not to test strength. A hard blow can crack a tile that is already loose.
- Pick a reference point – an area that looks intact and sits closer to the middle of the floor, away from edges and corners. Remember its sound.
- Tap in a grid with a step of 2–4 inches, moving in rows from one edge to the other.
- Mark the areas where the sound changes with painter's tape or a pencil right on the glaze.
- Go back to the marks and narrow down the borders, moving from the ringing zone to the dull one in small steps.
- Match the sound map to the tiles: a defect inside one tile and a defect spanning several tiles along a joint are different situations.
What the Sounds Mean
- Evenly ringing over the whole surface: the adhesive is spread properly. Normal.
- Dull only at corners and edges, ringing center: a little too little adhesive around the perimeter. Often acceptable; the risk comes with impact and moisture.
- A dull "barrel" sound over much of a tile: a large air pocket or the tile has come away from the adhesive. Needs attention.
- A hollow, booming sound over a large area of floor: a problem in the base, not in the tile.
- Ringing with a rattle and a tile that moves: full delamination, the tile is held only by the grout.
If a tile not only sounds dull but also shifts slightly under pressure, or moisture seeps from the joints, stop tapping – further blows only speed up the damage. Next to a toilet this often means the base underneath is already wet.
Where to Look First
Defects are not spread evenly, and knowing the typical zones saves a lot of time. The floor at the entrance, under plumbing fixtures and in wet zones comes first – constant loads and water speed up hidden defects. Also check areas around openings such as pipe outlets, and places where tile meets another surface.
To double-check a doubtful area, press your palm on the center of the tile and then on its corners in turn. Movement, crunching or a change in sound under pressure confirm delamination. Inspect the joints: cracks in the grout, darkening, moisture coming out point to an active defect.
Water Damage in the Bathroom Floor: How Deep It Goes
What you see tells you how far it went:
- Hollow tiles, a firm floor and dry grout: often just poor adhesion, but run the dye test and the meter check anyway.
- Dark or damp grout and hollow tiles near the toilet or tub: water is under the tile; find the leak before any tile is reset.
- A floor that gives or a toilet that rocks: the subfloor is wet or rotten, and the joists need a look.
Under a loose tile there is often moisture that keeps destroying the base.
How to Fix a Soft Spot in the Bathroom Floor
The repair goes in a fixed order: stop the leak, dry, replace the subfloor, check for mold. Skipping a step means the floor goes soft again.
1. Stop the Leak
If the problem is loose bolts, it is the simplest case:
- Remove the caps from the bolts at the base of the toilet.
- Tighten the bolts carefully with a wrench, one side and then the other.
- Check that the toilet no longer rocks.
- Do not overtighten the bolts, or the ceramic can crack.
Replacing the wax ring takes more effort. First shut off the water and drain the tank. Then disconnect the toilet from the floor, remove the old wax ring and set a new one. This takes care, since the toilet very often leaks from the bottom precisely because of a damaged seal. If the floor is soft, a new ring alone will not hold – the toilet has to go back on a solid base.
If there are serious cracks in the toilet base, the toilet has to be replaced. Trying to glue or patch the cracks usually gives a temporary result. It is better to call a plumber when there are problems with the drain pipes under the floor, when the toilet was installed incorrectly in the past, when you rent or have no plumbing experience, or when the leak does not stop after your own repair.
2. Dry the Floor
Once the toilet is off, the wet tile and underlayment around the flange come up, and the subfloor is left open to dry. Covering the problem with new finish does not work: the rot keeps spreading out of sight. For a floor that stayed wet for a long time, professional water damage restoration services use drying equipment and moisture readings to confirm the wood is actually dry.
3. Replace the Subfloor
Soft, rotted subfloor is cut out back to solid wood and replaced. The joists under it are checked too – if they are rotten, there is no sense in laying new tile on top.
4. Check for Mold
Spores settle in the wet wood and in the cavity under the floor. If you find dark growth on the subfloor, read how to tell black mold from mildew, and for larger areas look at mold remediation for affected bathroom areas.
Conclusion
Water leaking from under a toilet is a problem that needs a fast response. Most of the time the main thing is to diagnose the cause correctly and pick the right repair. A dry bathroom starts with an accurate search. Every hidden path of water leaves a clue: a stain, a whitish film, a wet joint, a hollow tile. The key is to look below eye level and not trust the first impression.
If you are dealing with a soft floor around the toilet, our La Mesa water damage restoration company can take a look. You can learn more about our team, read what local homeowners say, or browse more water damage articles on our blog.